Welcome to
the beta.
Thanks for helping us put v3 through its paces. This guide walks you through seven things to try — from your first login through to sending a report — and tells you exactly how to flag anything that looks off.
Before you start
Three quick thingsYour walkthrough
Seven things to tryTry the new passwordless login
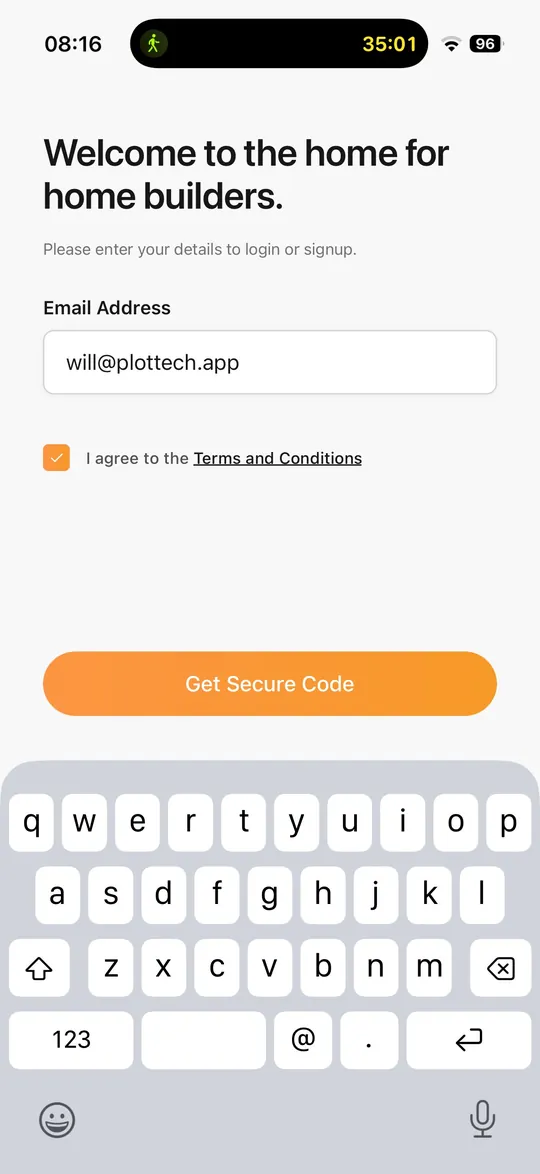
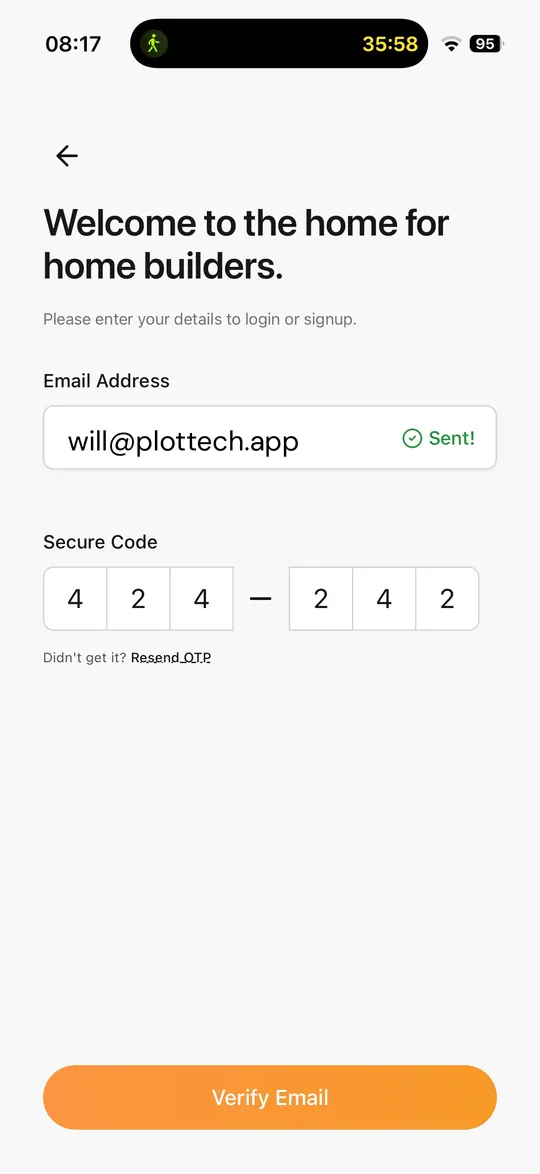
Open the app and pop in your email address. You'll get a one-time code sent to your inbox — punch it in and you're through. No password, no resets, no shared notebook behind the site office.
Once verified, the app initialises your account and runs a first sync. This pulls down your sites, plots, tasks, contacts and any previously captured photos.
- Login works without a password
- OTP code arrives in email within a minute
- Initial sync completes without errors
Watch your workspace come together
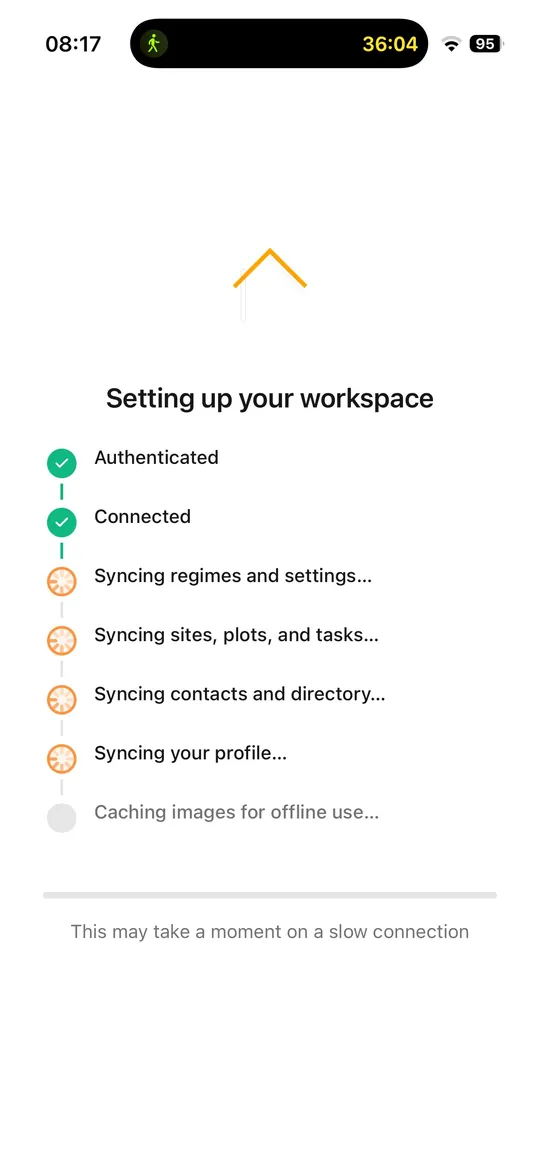
You'll see each phase tick off as your account initialises — Authenticated, Connected, Syncing regimes, sites, contacts and your profile.
The final stage caches images for offline use. This can take a moment on a slow connection, but it's safe to push to the background and crack on with the rest of the app.
- Each sync stage completes in turn
- You can background the image cache and keep going
- Your existing sites, plots and tasks all appear
Tab between Quality, Energy & Fire
The structure is what you're used to: open a Site, drill into a Plot, and you'll see the tasks that sit under each of the three capabilities. Tab between them at the top of the plot screen — same plot, three views.
Selecting a task like Internal (Rooms) under Quality, or Part L under Energy, takes you into the regime where you'll do the actual image capture.
- Site list loads and shows your sites
- Tabbing between Quality / Energy / Fire feels smooth
- Tasks open into the right regime
Add a contact to your directory
Hit Directory from the bottom nav and create a new entry. This is where your trades, building control inspectors, SAP assessors — anyone you'd want to assign work to — all live.
Assign the contact to one or more of your three capabilities: Quality, Energy or Fire. That tagging is what makes them appear as available assignees on the right tasks.
- You can create a new directory entry
- Assigning to Quality / Energy / Fire works
- The new contact shows up in the directory list
Capture an image and review it
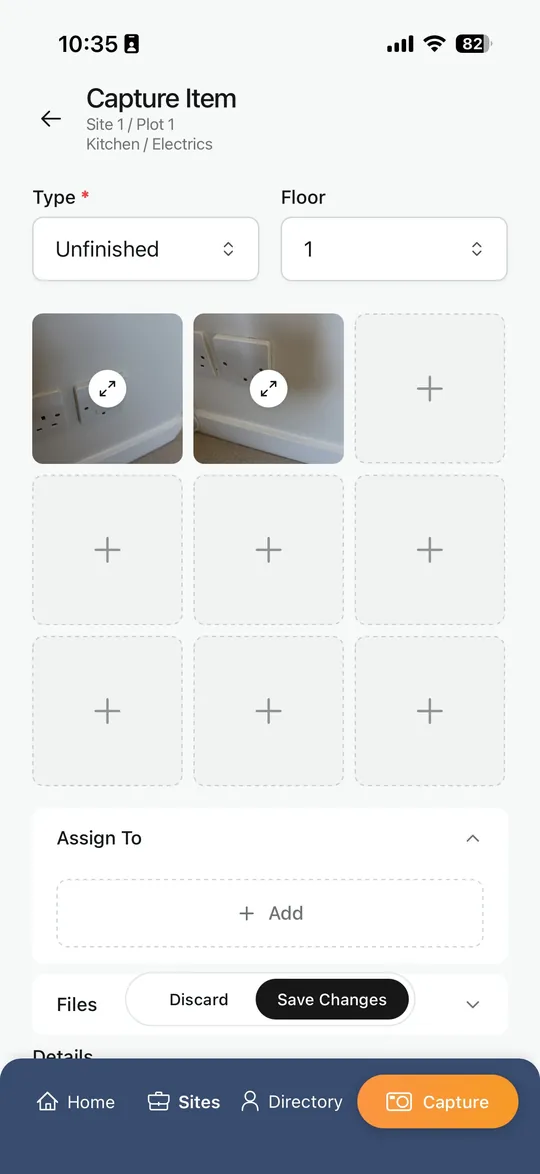
Inside a regime — say Internal (Rooms) or Part L — pick a section, then a subsection, and capture an image. You should see it appear in the item list straight away.
From there, try closing out an item as complete, and try marking an item for review so a colleague (or you) can come back to it later.
- Photo capture is fast and lands in the right place
- Items appear in the list without delay
- Close-out and mark-for-review both work as expected
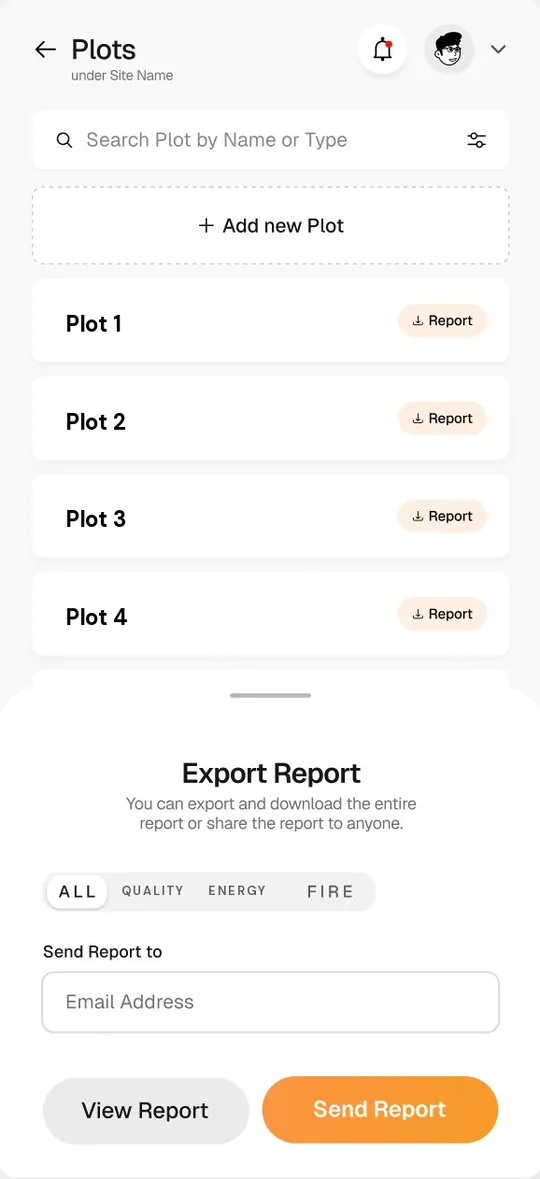
Send a report from a plot
From the plot screen, find the report icon and try generating a report. The PDF follows a consistent Capability → Task → Section → Subsection → Evidence structure across all three modules.
Send it to yourself or a teammate — have a look at how it reads, how the photos are laid out, and whether anything's missing or out of place.
- Report generates without errors
- Sections, subsections and photos look right
- The recipient receives it cleanly
Have a poke around Settings
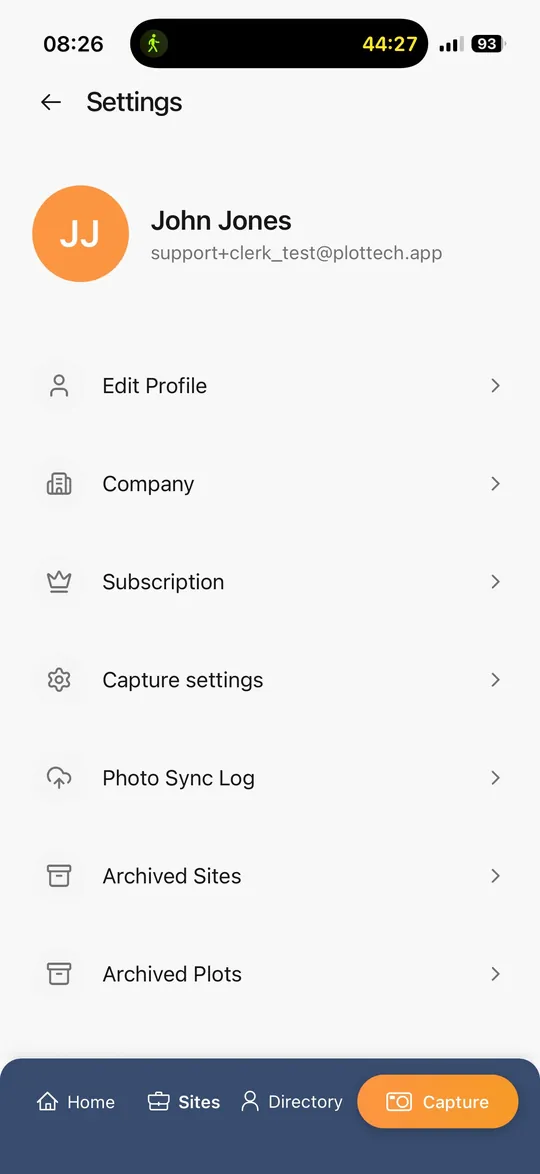
Last one. Open Settings from your avatar and have a look at Edit Profile, Company, Subscription, Capture settings, Photo Sync Log, Archived Sites and Archived Plots.
You don't need to change anything — just check that everything looks sensible and that nothing's obviously broken or missing for your account.
- Settings page loads with the right account info
- Each item opens without errors
- Photo Sync Log shows recent activity
Tell us everything.
Bugs, ideas, confusing moments, things that worked beautifully — all of it is gold. The faster we hear it, the faster v3 gets sharper for everyone.
What's most useful to share
Three flavours of feedbackBugs & broken things
Anything that crashes, errors, syncs incorrectly or simply doesn't do what you'd expect. Steps to reproduce + a screenshot is gold.
Ideas & improvements
Workflows that feel slow, missing shortcuts, things you wish the app did. Half-formed thoughts welcome — we'll pick up the rest.
Questions & confusion
If something's unclear, tell us where you got stuck. That's a signal we either need to redesign it or label it better.
Thanks for being part of this.
Beta testers are the difference between software that works and software that gets used. We genuinely appreciate you giving us the time — reach out any time.